Scoring to a Worksheet
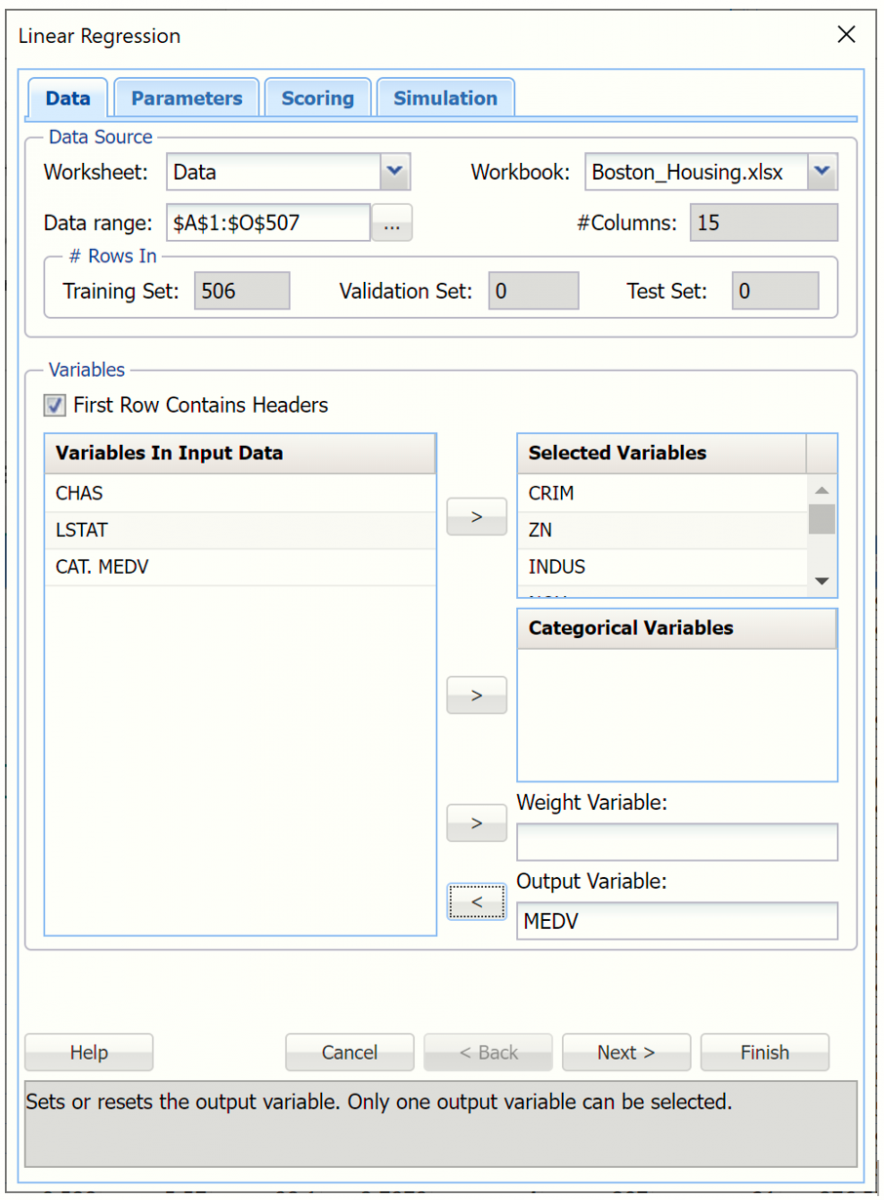
Analytic Solver Data Science can perform scoring on new data immediately after the classification or prediction method has completed; there's no need to perform a 2nd step of using the Scoring dialog. To illustrate, we'll re-use the Boston Housing example dataset. (To open, click Help – Example Models – Forecasting / Data Science Examples.) Click Predict – Linear Regression to open the Linear Regression - Data dialog and select the Output and Selected Variables, as shown in the screenshot below.
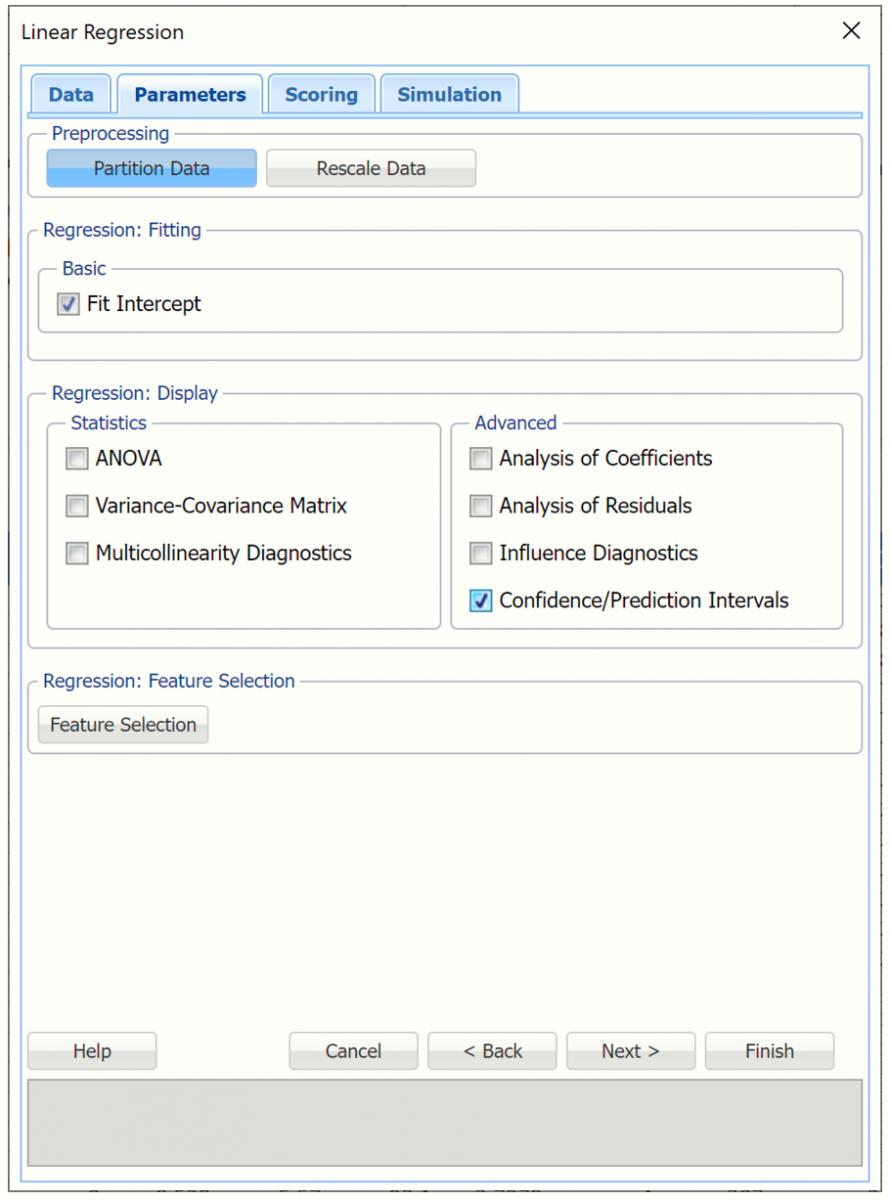
Click Next to advance to the Parameters dialog. Since we haven't yet partitioned the dataset, we will do so now. Click Partition Data to open the Partition Data Dialog, then select the Partition Data option to enable the Standard Partitioning Options. For more information on these partitioning options, please see the Data Scienc ePartitioning chapter that occurs earlier in this guide. Click Done to accept the partitioning defaults.

Under Advanced, Select Confidence/Prediction Intervals to include these intervals for the new predictions.
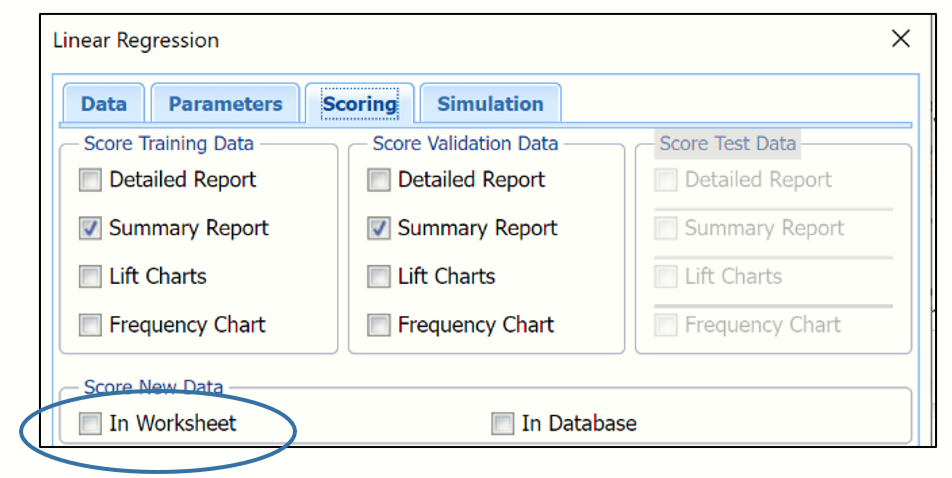
Click Next to advance to the Scoring dialog.
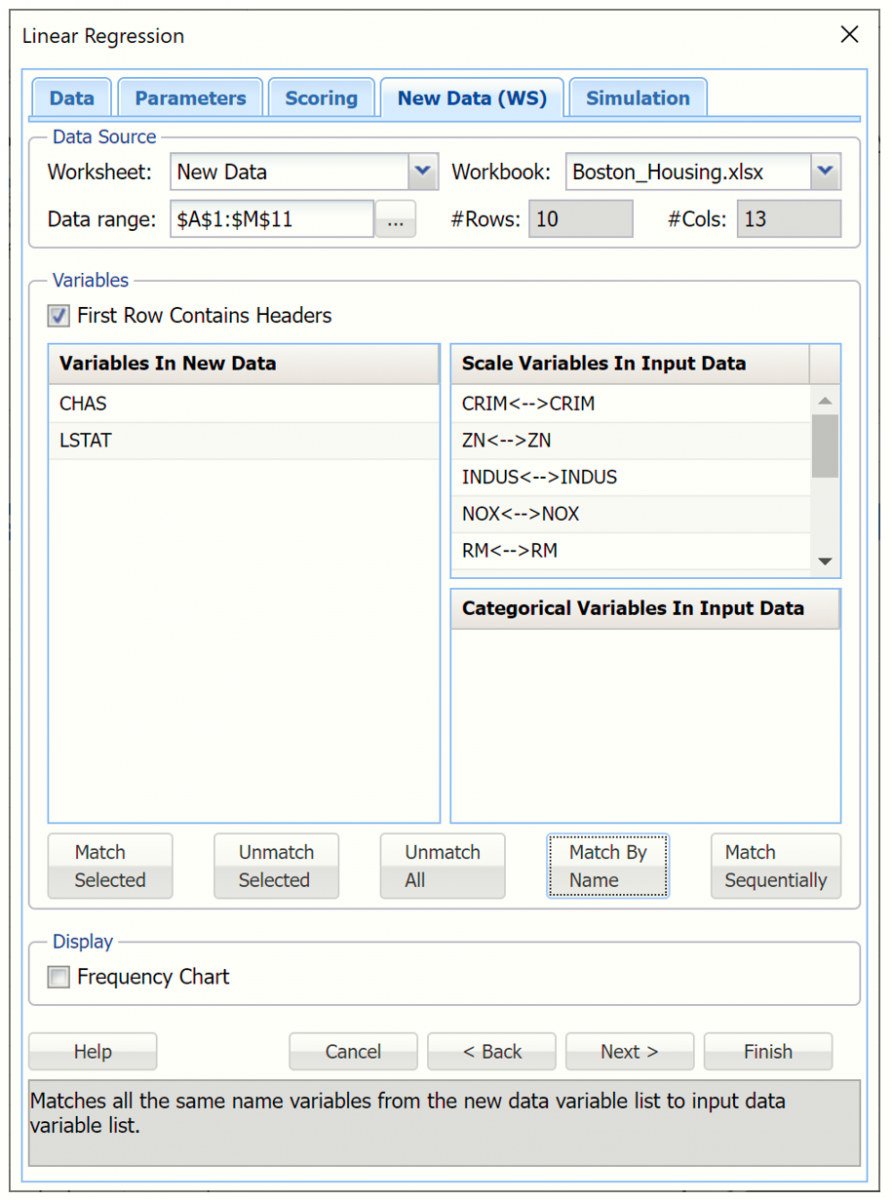
Select In Worksheet in the Score new data group. The dialog for Match variables in the New Range appears.
Select New Data for Worksheet at the top of the dialog.
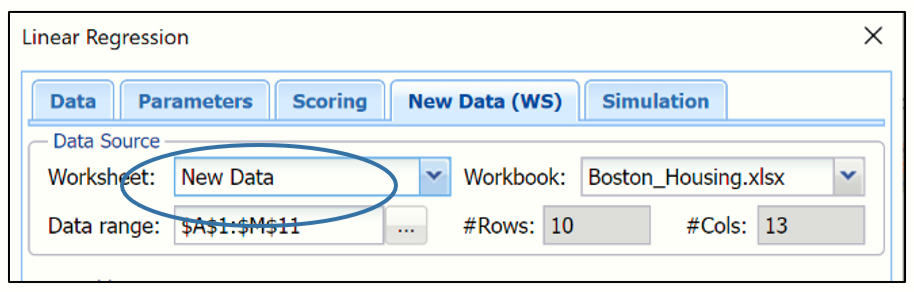
The variables listed under Variables in New Data are from the New Data worksheet and the variables listed under Scale Variables In Input Data are from the Data worksheet. Variables can be matched in three different ways.
- Matching by Name.
- Matching Sequentially
- Manually Matching.
If Match By Name is clicked, variables with the same names in each set will be matched.
If Match Sequentially is clicked, variables from each list are matched in sequence, i.e. 1st variable under Variables in New Data is matched with the 1st variable under Scale Variables in Input Data, 2nd variable under Variables in New Data is matched with the 2nd variable under Scale Variables in Input Data, etc.
Variables may also be matched manually by selecting a variable under Variables in New Data, selecting a variable in Scale Variables In Input Data, and clicking Match Selected. For example, select CRIM under Variables in new data and CRIM under Scale Variables In Input Data, then click Match Selected.
Click Match By Name to match the variables.
To unmatch all matched variables, click Unmatch all. To unmatch only one set of matched variables, select the matched variables in the Scale Variables in input Data list box, then select Unmatch Selected.
Risk Analysis Options
To add frequency charts to the output, select Frequency Chart. See the first section in the chapter, above, for the output from this checkbox. Leave this checkbox unchecked for this example.
From here you can either click Finish to score the new data or you can click Next to advance to the Simulation tab where you can perform a complete risk analysis on the data. See the previous chapter, Automatic Risk Analysis of Machine Learning Models, help topic for more information on the options displayed on the Simulation tab.
Click Finish.
Click the LinReg_NewScore worksheet, inserted to the right of the Data tab, to view the output as shown below.

Click the Intervals: New link on the Output Navigator to view the Confidence and Prediction Intervals on the LinReg_Intervals worksheet, for the new predictions.

Here we see the 95% Confidence and Prediction Intervals. Typically, Prediction Intervals are more widely utilized as they are a more robust range for the predicted value. For a given record, the Confidence Interval gives the mean value estimation with 95% probability. This means that with 95% probability, the regression line will pass through this interval. The Prediction Interval takes into account possible future deviations of the predicted response from the mean. There is a 95% chance that the predicted value will lie within the Prediction interval.
For more information on the rest of the Linear Regression output, please see the Predicting Housing Prices using Multiple Linear Regression chapter that appears earlier in this guide.