See Developers: Exporting RASON Results to Power BI for information on exporting model results to a Power BI report.
Now that the model results have been exported to Power BI and solved directly within the report, the same workflow can also be applied in Excel. This allows users to work with the same RASON model and results in a familiar spreadsheet environment, where inputs, outputs, and calculated results can be reviewed, adjusted, and analyzed using Excel’s native tools. The next section walks through exporting the model results to Excel and solving the model from within the workbook.
Step 15: Open Excel
Launch Microsoft Excel Desktop and ensure that an instance of Excel is running. Excel must be open in order to export results.
Step 16: Refresh Sources in RASON Desktop Extension
Return to Visual Studio Code and the RASON Desktop extension and click the Refresh icon under Excel Workbooks. Since a Blank Excel workbook was opened in Step 15, the Excel instance is labeled as “Untitled”. At least one Excel instance must be available to receive the export.
Figure 22 : Refreshing Sources in RASON Desktop Extension.

Step 17: Export Results to Excel
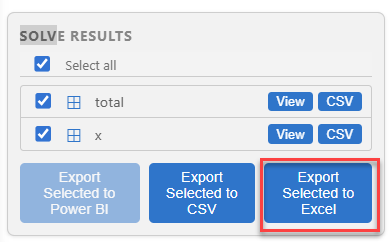
After solving the model in Visual Studio Code, the results can be exported to Excel Desktop for visualization and analysis. This allows you to view and present the optimal solution using Excel tables and charts. Under Solver Results in the RASON Console, select the results to export, in this case total (the final objective function value) and the x array (the number of each product to manufacture), then click, Export Selected to Excel.
Figure 23: Exporting model results to Excel
Step 18 Viewing Exported Results in Excel
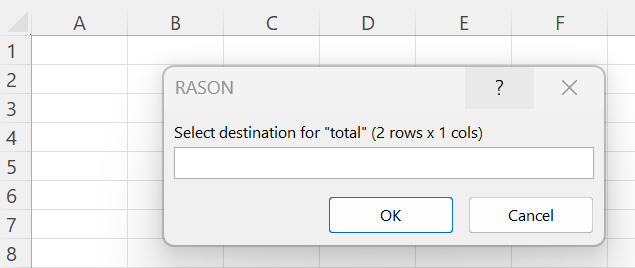
Switch back to Excel Desktop. A RASON dialog is waiting in the untitled Excel workbook, prompting you to select a destination for the total dataframe. Select or enter cell A1, then click OK to export the results for the total dataframe into the workbook.
Recall that total contains the final objective function value for the RASON model, ProductMix4.json. In this example, the destination must be large enough to hold the returned dataframe, which requires 2 rows by 1 column.
Figure 24: Select destination for "total" dataframe
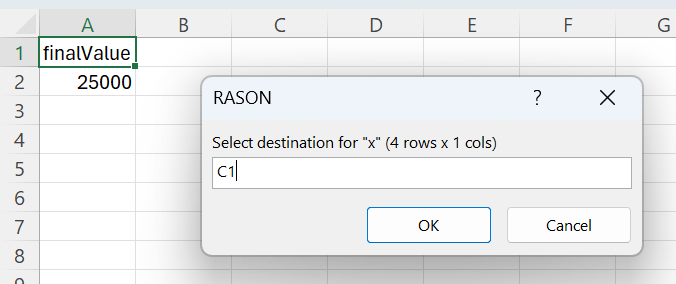
After clicking OK to export the total dataframe, a second RASON dialog appears asking for a destination for the x dataframe. Recall that the x dataframe contains the final variable values for the example model, representing the optimal production quantities returned by the solve.
Select or enter C1 as the destination cell to export the x results to the Excel worksheet, then click OK. In this example, the destination must be large enough to hold the returned dataframe, which requires 4 rows by 1 column.
Figure 25: Select destination for "x" dataframe
The exported results are added to the workbook.
Figure 26: Exported objective function value (total) and exported decision variable values (x).
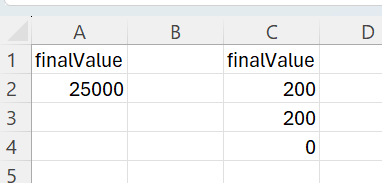
These results can be further explored using Excel charts to better understand the model’s output and communicate insights.
While exporting results allows you to visualize a solved model, RASON Desktop also enables you to export the full model to Excel, where it can be executed directly within a workbook. This distinction is important: exporting results provides a static view of the solution, while exporting the model enables execution within Excel.
Next: Export the Entire RASON Model to Excel
Continue to the next topic to export the full RASON model to the Excel workbook, so the model can be run and reviewed directly from Excel.